Simple Henna Tattoo Designs for Girls: A Beginner’s Guide to Beautiful Body Art
Looking for simple henna tattoo designs for girls that are both beautiful and easy to create? You’ve come to the right place! Henna, a natural dye derived from the henna plant, has been used for centuries to adorn the body with intricate and meaningful designs. In this comprehensive guide, we’ll explore the world of simple henna tattoos, providing you with inspiration, tips, and techniques to create stunning body art at home. Whether you’re a complete beginner or have some experience with henna, you’ll find plenty of ideas and guidance to create your own unique designs. We will cover everything from selecting the right henna paste to aftercare tips to prolong the life of your design, making sure your henna experience is a success.
Understanding Henna: A Brief Overview
Before diving into the designs, let’s understand the basics of henna. Henna is a natural dye derived from the *Lawsonia inermis* plant. The leaves are dried, crushed into a fine powder, and then mixed with liquids like water, lemon juice, or strong tea to create a paste. This paste is then applied to the skin, staining it a reddish-brown color that can last for several weeks.
Traditional henna is always brown. “Black henna,” which contains a chemical dye called paraphenylenediamine (PPD), is dangerous and can cause severe skin reactions. Always ensure you are using natural, brown henna.
The Cultural Significance of Henna
Henna holds deep cultural significance in many parts of the world, particularly in South Asia, the Middle East, and Africa. It’s often used in celebrations like weddings, festivals, and religious ceremonies, symbolizing good luck, joy, and prosperity. The intricate patterns and designs are not just decorative; they often carry symbolic meanings, representing blessings, protection, and wishes for the future. For example, in Indian weddings, the bride’s hands and feet are adorned with elaborate henna designs that can take hours to apply, signifying the start of a new chapter in her life.
Choosing the Right Henna Paste
Selecting the right henna paste is crucial for achieving a beautiful and long-lasting tattoo. There are two main options: pre-made henna cones and henna powder that you mix yourself.
* **Pre-made Henna Cones:** These are convenient and easy to use, especially for beginners. Ensure the cone contains only natural henna powder, water, lemon juice, and essential oils like lavender or tea tree oil. Avoid cones that list “black henna” or PPD as ingredients.
* **Henna Powder:** Mixing your own henna paste allows you to control the ingredients and consistency. Look for high-quality, finely sifted henna powder. Experiment with different liquid ratios and essential oils to find a recipe that works best for your skin and climate.
Testing for Allergies
Before applying henna extensively, it’s essential to perform a patch test. Apply a small amount of the henna paste to a small area of skin, such as your inner arm or behind your ear. Wait 24-48 hours to see if any irritation, redness, or itching occurs. If you experience any adverse reactions, discontinue use immediately.
Essential Tools for Henna Application
Besides henna paste, you’ll need a few essential tools to create your henna designs:
* **Applicator:** Pre-made henna cones come with a built-in applicator tip. For homemade paste, you can use a cone made from cellophane or a syringe with a fine-tipped nozzle.
* **Design Stencils (Optional):** Stencils can be helpful for beginners or for creating symmetrical designs. You can find a variety of henna stencils online or at craft stores.
* **Transfer Paper (Optional):** Use transfer paper to trace a design onto your skin before applying the henna paste. This is useful for complex or intricate patterns.
* **Cotton Swabs:** Use cotton swabs to clean up any mistakes or smudges during application.
* **Lemon Juice and Sugar Mixture:** Prepare a mixture of lemon juice and sugar to seal the henna paste after application. This helps to keep the paste moist and allows for a deeper stain.
* **Medical Tape (Optional):** Use medical tape to secure the henna paste in place, especially for designs on areas that are prone to movement.
Simple Henna Tattoo Designs for Girls: Inspiration and Ideas
Now comes the fun part: exploring simple henna tattoo designs for girls! Here are several ideas categorized by body part and design style to inspire your creativity:
Hand Henna Designs
Hands are the most popular area for henna application. Here are some simple designs:
* **Floral Vines:** Draw a simple vine with small flowers along your fingers or the back of your hand. This is a classic and elegant design that’s easy to create.
* **Geometric Patterns:** Use straight lines, dots, and triangles to create a modern and minimalist design on your palm or wrist.
* **Mandala-Inspired Designs:** Simplify a mandala design by focusing on the center and repeating basic shapes and patterns around it. A small mandala on the back of the hand is both beautiful and easy to achieve.
* **Finger Rings:** Create henna rings on your fingers by drawing simple bands or adding small embellishments like dots or swirls. These are quick and easy to apply.
* **Simple Bracelets:** Design a henna bracelet around your wrist using geometric patterns, floral motifs, or simple dots and lines.
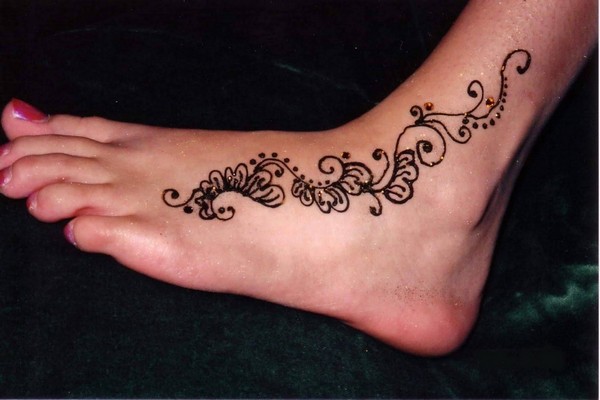
Foot Henna Designs
Feet are another popular canvas for henna art. Here are some simple ideas:
* **Ankle Bands:** Create a simple band around your ankle with geometric patterns or floral motifs.
* **Toe Rings:** Similar to finger rings, draw simple henna rings on your toes.
* **Floral Patterns on the Top of the Foot:** Draw a simple flower or a series of small flowers on the top of your foot, extending towards your toes.
* **Simple Vines Along the Foot:** Create a vine with leaves and small flowers along the side of your foot.
* **Geometric Patterns on the Heel:** Design a simple geometric pattern on your heel, using lines, dots, and triangles.
Arm Henna Designs
Arms offer a larger canvas for more elaborate designs, but you can still create simple and elegant patterns:
* **Bicep Bands:** Design a simple band around your bicep with geometric patterns or floral motifs.
* **Wrist Cuffs:** Create a henna cuff around your wrist using geometric patterns, floral motifs, or simple dots and lines.
* **Simple Vines Along the Forearm:** Draw a vine with leaves and small flowers along your forearm.
* **Feather Designs:** Feathers are a popular choice for arm henna designs. Simplify the design by focusing on the basic shape and adding a few simple details.
* **Simple Quotes:** Use simple block lettering to write a word or short phrase along your arm.
Neck and Shoulder Henna Designs
Neck and shoulder henna designs can be both elegant and understated:
* **Simple Floral Motifs:** Draw a small flower or a series of small flowers on your shoulder or the back of your neck.
* **Geometric Patterns:** Use straight lines, dots, and triangles to create a modern and minimalist design on your shoulder or neck.
* **Feather Designs:** Similar to arm designs, feathers can be adapted for the neck and shoulder area.
* **Simple Vines:** Create a vine with leaves and small flowers that extends from your shoulder to your neck.
* **Small Mandalas:** A small mandala on the back of the neck is both beautiful and easy to achieve.
Step-by-Step Guide to Applying Henna
Follow these steps to create your own simple henna tattoo:
1. **Prepare Your Skin:** Wash the area with soap and water and dry it thoroughly. Exfoliate gently to remove any dead skin cells.
2. **Apply the Design:** If using a stencil or transfer paper, apply it to your skin. If drawing freehand, lightly sketch the design with a skin-safe marker or pencil.
3. **Apply the Henna Paste:** Carefully apply the henna paste to your skin, following the design. Use a steady hand and apply even pressure to ensure a consistent stain.
4. **Seal the Paste:** Once the design is complete, seal the henna paste with a mixture of lemon juice and sugar. This helps to keep the paste moist and allows for a deeper stain.
5. **Wrap or Tape the Design:** If desired, wrap the design with medical tape or a bandage to secure the paste and prevent it from smudging.
6. **Leave it On:** Leave the henna paste on your skin for at least 2-6 hours, or preferably overnight, for the best results. The longer the paste stays on, the darker the stain will be.
7. **Remove the Paste:** Gently scrape off the dried henna paste. Avoid washing the area with water for at least 12 hours.
8. **Moisturize:** Apply a natural oil, such as coconut oil or olive oil, to the area to moisturize the skin and prolong the life of the stain.
Henna Aftercare: Tips for a Long-Lasting Stain
Proper aftercare is essential for achieving a dark and long-lasting henna stain:
* **Avoid Water:** Avoid washing the area with water for at least 12 hours after removing the paste. When you do wash it, gently pat it dry instead of rubbing.
* **Moisturize Regularly:** Apply a natural oil, such as coconut oil or olive oil, to the area several times a day to keep the skin moisturized.
* **Avoid Harsh Soaps and Chemicals:** Avoid using harsh soaps, detergents, or chemicals on the area, as they can fade the stain.
* **Avoid Exfoliation:** Avoid exfoliating the area, as this will remove the stained skin cells.
* **Stay Warm:** Keeping the area warm can help to darken the stain. You can use a hair dryer on a low setting to gently warm the area for a few minutes each day.
Troubleshooting Common Henna Problems
Even with careful preparation and application, you may encounter some common henna problems:
* **Faint Stain:** If the stain is too faint, it could be due to several factors, such as poor-quality henna paste, insufficient application time, or improper aftercare. Ensure you are using high-quality henna paste, leaving it on for an adequate amount of time, and following the aftercare instructions carefully.
* **Uneven Stain:** An uneven stain can occur if the henna paste is not applied evenly or if some areas of the skin are drier than others. Exfoliate the skin before application and apply the henna paste evenly.
* **Smudging:** Smudging can occur if the henna paste is not properly secured or if you move around too much during the application process. Use medical tape or a bandage to secure the paste and try to stay still while it’s drying.
* **Allergic Reaction:** Although rare, allergic reactions to natural henna can occur. If you experience any irritation, redness, or itching, discontinue use immediately and consult a doctor.
Henna Safety: What to Avoid
It’s crucial to prioritize safety when working with henna. Here are some things to avoid:
* **Black Henna:** Never use “black henna,” as it contains a chemical dye called paraphenylenediamine (PPD) that can cause severe skin reactions, permanent scarring, and even life-threatening allergic reactions. Natural henna is always brown.
* **Chemical Additives:** Avoid henna pastes that contain chemical additives, as they can be harmful to your skin. Stick to natural henna pastes made with henna powder, water, lemon juice, and essential oils.
* **Eye Contact:** Avoid getting henna paste in your eyes, as it can cause irritation and damage. If henna paste gets in your eyes, rinse them immediately with water.
* **Internal Use:** Henna paste is for external use only. Do not ingest it.
Simple Henna Tattoo Designs for Girls: Beyond the Basics
Once you’ve mastered the basics of simple henna tattoo designs for girls, you can explore more advanced techniques and designs:
* **Layering:** Layering involves applying multiple layers of henna paste to create a three-dimensional effect. This technique can add depth and dimension to your designs.
* **Shading:** Shading involves using different concentrations of henna paste to create subtle variations in color. This technique can add realism and detail to your designs.
* **Negative Space:** Negative space involves leaving certain areas of the skin blank to create a contrast between the henna stain and the skin. This technique can create visually striking and modern designs.
* **Combining Different Patterns:** Experiment with combining different patterns and motifs to create unique and personalized designs.
* **Adding Embellishments:** Add embellishments like glitter, sequins, or beads to your henna designs to make them even more special.
The Future of Henna Art
The art of henna is constantly evolving, with new techniques, designs, and trends emerging all the time. Social media platforms like Instagram and Pinterest have played a significant role in popularizing henna art and inspiring artists and enthusiasts around the world. As more people discover the beauty and versatility of henna, it’s likely that this ancient art form will continue to thrive and evolve for generations to come. The increasing awareness of the dangers of “black henna” is also a positive trend, as it encourages people to choose natural henna and prioritize their safety.
Q&A: Your Henna Questions Answered
Here are some frequently asked questions about simple henna tattoo designs for girls:
1. **How long does a henna tattoo last?**
A henna tattoo typically lasts for 1-3 weeks, depending on the quality of the henna paste, the application technique, and the aftercare routine. Factors like skin type, climate, and exposure to water can also affect the longevity of the stain.
2. **Is henna safe for children?**
Natural henna is generally considered safe for children, but it’s essential to perform a patch test before applying it extensively. Avoid using “black henna” on children, as it can cause severe skin reactions.
3. **Can I swim with a henna tattoo?**
Swimming can fade the henna stain more quickly due to the chlorine and salt water. Apply a waterproof balm or oil to protect the design before swimming.
4. **How can I make my henna tattoo darker?**
To achieve a darker henna stain, use high-quality henna paste, leave it on for an extended period, seal it with a lemon juice and sugar mixture, and keep the area warm.
5. **Can I use henna on my hair?**
Yes, henna can be used to dye your hair. It’s a natural and chemical-free alternative to commercial hair dyes. However, keep in mind that henna will permanently stain your hair, so choose the color carefully.
6. **How do I remove a henna tattoo?**
Henna tattoos will fade naturally over time. You can speed up the fading process by exfoliating the skin, using lemon juice, or applying bleaching creams. However, avoid harsh methods that can irritate the skin.
7. **Can I use henna if I’m pregnant or breastfeeding?**
Consult your doctor before using henna if you’re pregnant or breastfeeding. While natural henna is generally considered safe, it’s always best to err on the side of caution.
8. **What are some common henna design mistakes to avoid?**
Common henna design mistakes include using poor-quality henna paste, applying the paste unevenly, not leaving it on long enough, and neglecting aftercare. Avoid these mistakes by following the tips and instructions in this guide.
9. **Where can I find inspiration for henna designs?**
You can find inspiration for henna designs on social media platforms like Instagram and Pinterest, as well as in books, magazines, and online resources.
10. **How can I become a professional henna artist?**
To become a professional henna artist, practice your skills, take workshops or classes, build a portfolio, and market your services. Networking with other artists and attending henna conferences can also be beneficial.
Conclusion: Unleash Your Creativity with Simple Henna Tattoos
Simple henna tattoo designs for girls offer a fun, creative, and culturally rich way to express yourself. With the right tools, techniques, and inspiration, you can create stunning body art that reflects your unique style and personality. Remember to prioritize safety by using natural henna and avoiding harmful chemicals. Whether you’re a beginner or an experienced artist, the world of henna is full of endless possibilities. We’ve shared tips based on our experience and expert consensus to help you along your journey. Now it’s your turn to experiment, explore, and unleash your creativity with simple henna tattoos! Share your creations and experiences in the comments below, and let’s celebrate the beauty of this ancient art form together.
Ready to take your henna skills to the next level? Explore our advanced guide to intricate henna designs or contact our experts for a personalized consultation on creating custom henna patterns.
