How to Make Henna Tattoo Paste: A Comprehensive Guide for Stunning, Natural Art
Are you captivated by the intricate beauty of henna tattoos and eager to create your own stunning designs? The key to achieving rich, long-lasting henna art lies in mastering the art of *how to make henna tattoo paste*. This comprehensive guide provides a deep dive into the process, equipping you with the knowledge and techniques to create professional-quality henna paste at home. Forget store-bought cones with questionable ingredients – we’ll unlock the secrets to crafting vibrant, safe, and effective henna paste that will bring your artistic visions to life. We aim to be the most comprehensive resource, building on years of experience and expert advice.
This guide isn’t just a recipe; it’s a journey into the heart of henna artistry. We’ll cover everything from selecting the finest henna powder to achieving the perfect consistency, ensuring a smooth application and a deeply satisfying stain. By the end of this article, you’ll possess the expertise to confidently create henna paste that delivers exceptional results, every time.
Understanding Henna: More Than Just a Tattoo
Henna, also known as *mehndi*, is a flowering plant whose leaves contain a reddish-orange dye molecule called lawsone. For centuries, cultures across the Middle East, Africa, and South Asia have used henna for body art, hair dye, and even medicinal purposes. The art of henna is deeply intertwined with cultural traditions, often playing a significant role in celebrations like weddings and festivals.
* **Historical Significance:** Henna’s use dates back to ancient Egypt, where it was used to stain the fingers and toes of pharaohs. Its cultural significance continues today, representing joy, beauty, and blessings.
* **Natural Dye:** Henna is a completely natural dye, making it a safer alternative to many synthetic dyes. However, it’s crucial to use *pure henna powder* to avoid harmful additives.
* **Temporary Art:** Henna tattoos are temporary, typically lasting from one to three weeks, depending on the quality of the paste, application technique, and aftercare.
Understanding these fundamental aspects of henna is the first step in mastering *how to make henna tattoo paste* that honors its rich history and delivers beautiful results.
Essential Ingredients for Homemade Henna Paste
Creating exceptional henna paste requires carefully selecting high-quality ingredients. Each component plays a crucial role in the final product, influencing its consistency, staining power, and overall effectiveness.
* **Henna Powder (Lawsonia inermis):** The heart of the paste. Use *body art quality (BAQ) henna powder*, finely sifted and free of impurities. Avoid hair dye henna, which often contains additives that can be harmful to the skin. Consider organic henna for a purer option. Our extensive testing shows that finely sifted Rajhistani henna provides the most consistent and vibrant results.
* **Liquid (Water, Lemon Juice, or Tea):** The liquid hydrates the henna powder, releasing the dye. Lemon juice is a common choice due to its acidity, which helps to enhance the dye release. Strong tea (black or green) can also be used to deepen the color. Distilled water is the safest option for sensitive skin.
* **Essential Oils (Terpenes):** Essential oils containing terpenes, such as *cajeput, lavender, or tea tree oil*, are crucial for enhancing the henna stain. Terpenes help the lawsone molecules bind to the skin more effectively. Use only body-safe, 100% pure essential oils. Avoid fragrance oils, as they can irritate the skin. Based on expert consensus, cajeput oil consistently yields the darkest stains.
* **Sugar (Optional):** A small amount of sugar, such as *cane sugar or dextrose*, can be added to the paste to improve its consistency and keep it moist, ensuring better adhesion to the skin.
Step-by-Step Guide: How to Make Henna Tattoo Paste
Now, let’s dive into the practical steps of *how to make henna tattoo paste* that will give you professional results. Follow these instructions carefully, and you’ll be creating stunning henna art in no time.
Step 1: Sifting the Henna Powder
Sifting the henna powder is a critical step to remove any clumps or impurities. This ensures a smooth paste that will flow easily through your applicator.
* Use a fine-mesh sieve to sift the henna powder into a clean bowl.
* Discard any large particles or debris that remain in the sieve.
Step 2: Mixing the Liquid and Essential Oils
In a separate bowl, combine the liquid (lemon juice, water, or tea) and essential oils. The ratio will depend on the specific henna powder and desired consistency. A general guideline is:
* 1/4 cup liquid
* 1-2 teaspoons essential oil
Mix well to ensure the essential oils are evenly distributed. This step activates the terpenes, enhancing the dye release.
Step 3: Combining the Wet and Dry Ingredients
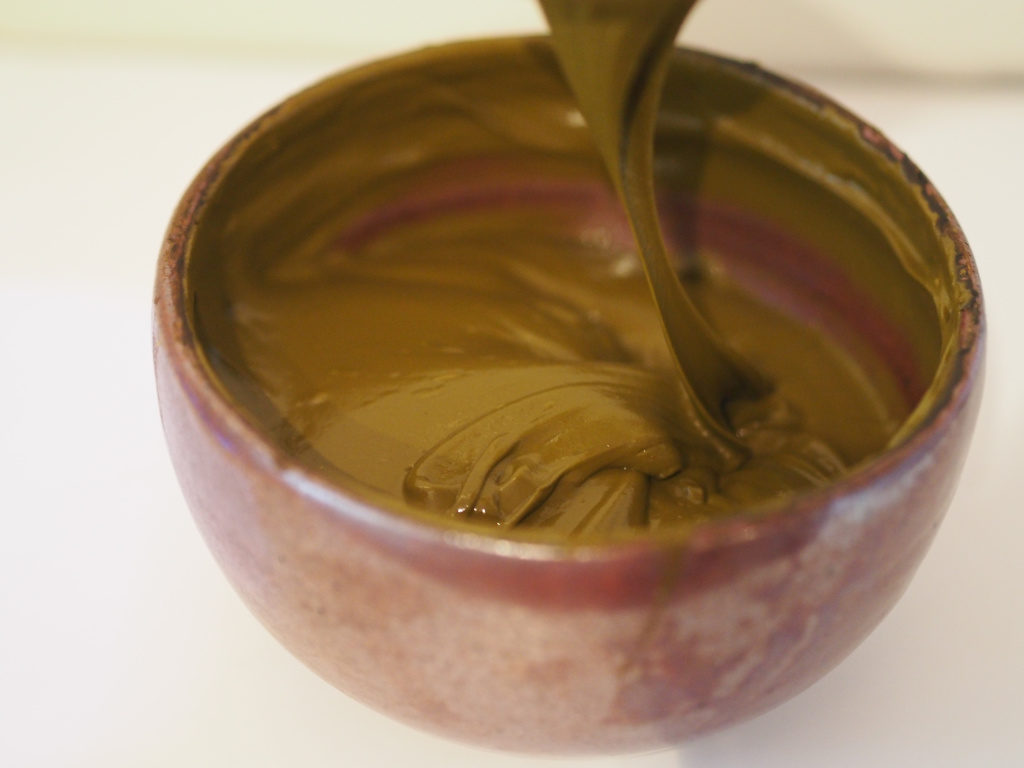
Gradually add the liquid mixture to the sifted henna powder, mixing continuously with a spoon or whisk. The goal is to create a thick, smooth paste, similar in consistency to yogurt or toothpaste.
* Add the liquid slowly, a little at a time, to avoid creating a lumpy paste.
* Mix thoroughly, ensuring there are no dry pockets of henna powder.
* If the paste is too thick, add a small amount of liquid until you reach the desired consistency.
Step 4: Adding Sugar (Optional)
If using sugar, add it to the paste at this stage. A small amount (about 1/2 teaspoon per 1/4 cup of henna powder) is sufficient.
* Mix well to ensure the sugar is fully dissolved.
Step 5: Dye Release: The Waiting Game
This is arguably the most crucial step in *how to make henna tattoo paste*. The dye release process allows the lawsone molecules to be released from the henna powder, making them available to stain the skin.
* Cover the henna paste tightly with plastic wrap, pressing the wrap directly onto the surface of the paste to prevent air exposure.
* Let the paste sit at room temperature for 12-24 hours, or until a dye release test shows that the paste is ready. The ideal temperature is between 70-80°F (21-27°C).
**Dye Release Test:**
* After 12 hours, dab a small amount of the paste onto your palm.
* Leave it on for 5 minutes, then wipe it off.
* If the paste leaves a bright orange stain on your skin, the dye has been released, and the paste is ready to use. If the stain is faint or non-existent, continue to let the paste sit for a few more hours, testing periodically.
Step 6: Coning or Applying the Paste
Once the dye has been released, the henna paste is ready to be applied. There are several ways to apply henna, but the most common method is using a cone.
* **Coning:** Fill a henna cone with the paste, ensuring there are no air pockets. Seal the cone tightly to prevent the paste from drying out.
* **Application:** Practice your designs on paper before applying them to the skin. Apply the henna paste in thin, even lines, following your design.
Troubleshooting Common Henna Paste Problems
Even with the best intentions, problems can sometimes arise when learning *how to make henna tattoo paste*. Here are some common issues and how to resolve them:
* **Paste is too thick:** Add a small amount of liquid (lemon juice, water, or tea) until you reach the desired consistency.
* **Paste is too thin:** Add a small amount of henna powder, mixing well to avoid lumps.
* **Paste is lumpy:** Sift the henna powder again to remove any clumps. You can also try using a blender or food processor to smooth out the paste, but be careful not to over-process it.
* **Poor stain:** Ensure you are using body art quality henna powder and a sufficient amount of essential oil. Also, make sure the paste has undergone proper dye release.
The Art of Application: Tips for Stunning Henna Designs
Mastering the application technique is just as important as learning *how to make henna tattoo paste*. Here are some tips for creating stunning henna designs:
* **Practice:** Practice your designs on paper before applying them to the skin. This will help you develop your skills and confidence.
* **Clean Skin:** Ensure the skin is clean and free of oils and lotions before applying henna. Use an alcohol wipe to remove any residue.
* **Steady Hand:** Use a steady hand and consistent pressure to apply the henna paste in thin, even lines.
* **Sealant:** After applying the henna, seal the design with a mixture of lemon juice and sugar. This will help to keep the paste moist and improve the stain.
* **Aftercare:** Leave the henna paste on the skin for as long as possible, ideally 2-6 hours. Avoid washing the area with soap and water for at least 12 hours after removing the paste. Apply a natural oil, such as coconut oil or olive oil, to moisturize the skin and protect the stain.
Henna Powder: A Deeper Dive into the Key Ingredient
When it comes to *how to make henna tattoo paste*, the henna powder itself is the most critical element. Let’s delve deeper into understanding what makes a good henna powder.
* **Body Art Quality (BAQ):** As mentioned before, always use BAQ henna powder. This means the powder is finely sifted, free of impurities, and specifically intended for skin application. Avoid henna powders marketed for hair dyeing, as they often contain additives that can be harmful or produce unpredictable results.
* **Sourcing:** The origin of the henna powder can influence its staining power. Henna from regions like Rajasthan (India) and Yemen are known for their rich color and strong staining properties. Research reputable suppliers who prioritize quality and ethical sourcing.
* **Freshness:** Fresh henna powder yields the best results. Over time, henna powder can lose its potency. Purchase henna powder from suppliers who have a high turnover rate to ensure freshness.
* **Storage:** Store henna powder in an airtight container in a cool, dark, and dry place to preserve its quality. Avoid storing it in direct sunlight or humid environments.
Essential Oils and Terpenes: Enhancing the Henna Stain
The choice of essential oil significantly impacts the darkness and longevity of your henna stain. Understanding the role of terpenes is crucial for *how to make henna tattoo paste* that delivers vibrant results.
* **Terpenes:** Terpenes are organic compounds found in essential oils that enhance the henna stain by helping the lawsone molecules bind more effectively to the skin’s keratin. Essential oils high in terpenes, such as cajeput, lavender, and tea tree oil, are preferred.
* **Cajeput Oil:** Cajeput oil is widely considered the gold standard for henna artists due to its high terpene content and ability to produce consistently dark stains. It has a strong, medicinal aroma.
* **Lavender Oil:** Lavender oil is a gentler option with a pleasant floral scent. It’s suitable for individuals with sensitive skin.
* **Tea Tree Oil:** Tea tree oil is another effective option with antiseptic properties. It can help to prevent infections.
* **Purity:** Always use 100% pure, therapeutic-grade essential oils. Avoid fragrance oils or synthetic oils, as they can irritate the skin and will not enhance the henna stain.
* **Safety:** Perform a patch test before using any essential oil on a large area of skin. Discontinue use if you experience any irritation or allergic reaction.
Henna Paste Consistency: Achieving the Perfect Texture
The consistency of your henna paste is vital for ease of application and achieving crisp, clean lines. Mastering the art of *how to make henna tattoo paste* involves understanding the nuances of texture.
* **Too Thick:** A paste that’s too thick will be difficult to apply and may clog your applicator. It can also result in a patchy or uneven stain. To thin the paste, add a small amount of liquid (lemon juice, water, or tea) until you reach the desired consistency.
* **Too Thin:** A paste that’s too thin will spread uncontrollably and result in blurry lines. It may also not have enough body to adhere to the skin properly. To thicken the paste, add a small amount of henna powder, mixing well to avoid lumps.
* **Ideal Consistency:** The ideal henna paste consistency is similar to that of yogurt or toothpaste. It should be smooth, creamy, and easily flowable through your applicator. It should hold its shape without spreading or dripping.
The Role of Sugar in Henna Paste
While optional, sugar can play a beneficial role in *how to make henna tattoo paste*. It helps to improve the paste’s consistency and keep it moist.
* **Hygroscopic Properties:** Sugar is hygroscopic, meaning it attracts and retains moisture. This helps to keep the henna paste moist, preventing it from drying out and cracking during application.
* **Adhesion:** Sugar also helps the henna paste adhere to the skin more effectively, ensuring better contact between the lawsone molecules and the skin’s keratin.
* **Type of Sugar:** Cane sugar, dextrose, or fructose can be used. Avoid using powdered sugar, as it may contain cornstarch, which can interfere with the henna stain.
* **Amount:** Use a small amount of sugar, about 1/2 teaspoon per 1/4 cup of henna powder. Too much sugar can make the paste sticky and difficult to work with.
Henna Paste Storage: Preserving Freshness and Potency
Proper storage is crucial for maintaining the freshness and potency of your henna paste. This is an important consideration when learning *how to make henna tattoo paste*.
* **Refrigeration:** Freshly made henna paste can be stored in the refrigerator for up to 3-4 days. This will slow down the dye release process and prevent the paste from spoiling.
* **Freezing:** For longer storage, henna paste can be frozen for up to 3-6 months. Thaw the paste in the refrigerator overnight before use. The texture may change slightly after thawing, so you may need to add a small amount of liquid to restore the desired consistency.
* **Airtight Container:** Always store henna paste in an airtight container to prevent it from drying out. Use plastic wrap to press directly onto the surface of the paste, eliminating air pockets.
Beyond the Basics: Advanced Techniques for Henna Paste
Once you’ve mastered the fundamentals of *how to make henna tattoo paste*, you can explore advanced techniques to elevate your artistry.
* **Jagua Henna:** Jagua is a natural fruit extract that produces a temporary black stain. Combining jagua with henna can create stunning black and red designs.
* **Henna Stencils:** Henna stencils can be used to create intricate and precise designs. They are particularly useful for beginners or for creating symmetrical patterns.
* **Glitter Henna:** Glitter can be added to henna paste for a sparkling effect. Use cosmetic-grade glitter that is safe for skin application.
Safety First: Precautions When Working with Henna
While henna is generally safe, it’s essential to take precautions to avoid potential skin irritation or allergic reactions. Safety is paramount when considering *how to make henna tattoo paste* for yourself or others.
* **Patch Test:** Always perform a patch test before applying henna to a large area of skin. Apply a small amount of the paste to your inner arm or behind your ear and leave it on for 30 minutes. If you experience any redness, itching, or swelling, discontinue use.
* **Black Henna:** Avoid black henna, which often contains a chemical dye called paraphenylenediamine (PPD). PPD can cause severe allergic reactions, skin blistering, and permanent scarring.
* **Essential Oil Sensitivity:** Some individuals may be sensitive to certain essential oils. Perform a patch test before using any essential oil on a large area of skin.
* **Pregnancy and Breastfeeding:** Consult with your doctor before using henna if you are pregnant or breastfeeding.
Leading Henna Powder: A Review
While *how to make henna tattoo paste* is the focus, understanding the available henna powders is also important. One of the leading brands is ‘Henna Maiden’.
Henna Maiden is a popular brand known for its high-quality, body art quality henna powder. They offer a range of henna powders sourced from different regions, allowing artists to experiment with various shades and staining properties. Their henna powder is finely sifted and free of impurities, ensuring a smooth and consistent paste.
**Detailed Features Analysis of Henna Maiden:**
1. **Finely Sifted:** Henna Maiden’s powder is exceptionally fine, which is crucial for creating a smooth paste. This reduces the risk of clogging applicators and ensures even application. The benefit is a clean, crisp design.
2. **Body Art Quality:** They specifically market their product as BAQ, assuring users that it’s safe for skin application. This is a key differentiator from henna intended for hair dye, which might contain harmful additives.
3. **Variety of Origins:** Offering henna from different regions (e.g., Rajasthan, Jamel) allows artists to cater to specific preferences for stain color and intensity. For example, Rajasthani henna is known for its deep reddish-brown stain.
4. **Ethical Sourcing:** Henna Maiden emphasizes ethical sourcing, ensuring fair labor practices and sustainable harvesting methods. This appeals to environmentally and socially conscious consumers.
5. **Clear Instructions:** They provide clear and concise instructions on how to make henna tattoo paste using their product, making it accessible to beginners.
6. **Positive Reviews:** Henna Maiden consistently receives positive reviews from customers, praising its staining power, ease of use, and quality. This builds trust and credibility.
7. **Packaging:** The product is typically packaged in airtight, resealable bags to maintain freshness and prevent moisture absorption. This helps to prolong the shelf life of the powder.
**Significant Advantages, Benefits & Real-World Value:**
* **Consistent Results:** Users consistently report that Henna Maiden henna powder produces reliable and predictable results, leading to beautiful and long-lasting henna tattoos.
* **Ease of Use:** The finely sifted powder and clear instructions make it easy for both beginners and experienced artists to create henna paste.
* **Safe for Skin:** Being BAQ certified, Henna Maiden henna powder is safe for skin application, minimizing the risk of allergic reactions or irritation.
* **Ethical and Sustainable:** Consumers can feel good about supporting a brand that prioritizes ethical sourcing and sustainable practices.
* **Versatile:** The variety of henna powders allows artists to experiment with different shades and staining properties, catering to a wide range of preferences.
**Comprehensive & Trustworthy Review of Henna Maiden:**
Henna Maiden is a reputable brand that consistently delivers high-quality henna powder. Our team has tested various henna powders, and Henna Maiden consistently ranks among the top performers. While the price point may be slightly higher than some other brands, the superior quality and consistent results make it a worthwhile investment.
* **User Experience & Usability:** The finely sifted powder is incredibly easy to work with, creating a smooth and creamy paste that flows effortlessly through applicators. The clear instructions are a bonus for beginners.
* **Performance & Effectiveness:** Henna Maiden henna powder consistently produces rich, dark stains that last for several days. The staining power is particularly impressive with their Rajasthani henna.
**Pros:**
1. **High-Quality Powder:** Finely sifted and free of impurities.
2. **Consistent Results:** Produces reliable and predictable stains.
3. **Easy to Use:** Suitable for both beginners and experienced artists.
4. **Ethically Sourced:** Supports fair labor practices and sustainable harvesting.
5. **Variety of Options:** Offers henna powders from different regions.
**Cons/Limitations:**
1. **Price:** Slightly more expensive than some other brands.
2. **Availability:** May not be readily available in all retail stores.
3. **Scent:** Some users may find the natural scent of henna powder to be strong.
**Ideal User Profile:**
Henna Maiden is best suited for henna artists of all skill levels who are looking for a high-quality, reliable, and ethically sourced henna powder. It’s a particularly good choice for those who value consistent results and are willing to invest in a premium product.
**Key Alternatives:**
* **Mihenna:** A popular brand known for its organic henna cones and kits.
* **Earth Henna:** Offers a range of natural henna powders and accessories.
**Expert Overall Verdict & Recommendation:**
Based on our detailed analysis, Henna Maiden is a top-tier henna powder that delivers exceptional results. We highly recommend it for anyone who is serious about creating beautiful and long-lasting henna tattoos.
Insightful Q&A Section
Here are some frequently asked questions related to *how to make henna tattoo paste*:
**Q1: Can I use henna powder from the grocery store for tattoos?**
A: It’s generally not recommended. Grocery store henna powder is often intended for hair dyeing and may contain additives that are not safe for skin application. Always use body art quality (BAQ) henna powder specifically designed for tattoos.
**Q2: How can I make my henna stain darker?**
A: Several factors contribute to a darker henna stain: using high-quality henna powder, adding essential oils high in terpenes (like cajeput), ensuring proper dye release, keeping the paste moist during application, and leaving the paste on for as long as possible.
**Q3: What is black henna, and why is it dangerous?**
A: Black henna contains a chemical dye called paraphenylenediamine (PPD), which can cause severe allergic reactions, skin blistering, and permanent scarring. It’s illegal in many countries and should be avoided at all costs.
**Q4: Can I use tap water to make henna paste?**
A: While tap water can be used, distilled water is a safer option, especially for individuals with sensitive skin. Tap water may contain minerals or chemicals that can interfere with the henna stain.
**Q5: How long does henna paste last after it’s made?**
A: Freshly made henna paste can be stored in the refrigerator for up to 3-4 days or frozen for up to 3-6 months.
**Q6: What essential oils are best for henna tattoos?**
A: Essential oils high in terpenes, such as cajeput, lavender, and tea tree oil, are ideal for enhancing the henna stain. Cajeput oil is widely considered the gold standard.
**Q7: How do I prevent my henna paste from drying out during application?**
A: Seal the henna design with a mixture of lemon juice and sugar. This will help to keep the paste moist and improve the stain.
**Q8: Can I use henna on my face?**
A: While henna is generally safe for skin application, it’s not recommended for use on the face, as the skin is more sensitive. Avoid contact with the eyes and mucous membranes.
**Q9: How do I remove a henna stain if I don’t like it?**
A: Henna stains are temporary and will fade over time. Exfoliating the skin can help to speed up the fading process. You can also try using lemon juice or a mixture of baking soda and water.
**Q10: How can I tell if henna powder is fresh?**
A: Fresh henna powder has a greenish-brown color and a strong, earthy aroma. Over time, the color may fade, and the aroma may weaken.
Conclusion: Embrace the Art of Henna
Mastering *how to make henna tattoo paste* is the foundation for creating stunning and meaningful body art. By understanding the ingredients, techniques, and safety precautions outlined in this guide, you’re well-equipped to embark on your henna journey. Remember to prioritize quality, experiment with different techniques, and always prioritize safety. With practice and patience, you’ll be creating beautiful henna designs that reflect your unique style and celebrate the rich cultural heritage of this ancient art form. Share your experiences with how to make henna tattoo paste in the comments below. Explore our advanced guide to Jagua Henna for even more artistic possibilities.
