Do Kroger Baby Back Ribs Have the Membrane Removed? A BBQ Expert’s Deep Dive
Are you standing in the meat aisle at Kroger, eyeing those tempting baby back ribs, and wondering, “**Do Kroger baby back ribs have the membrane removed?**” You’re not alone! This question is crucial for achieving tender, fall-off-the-bone perfection in your barbecue. Many home cooks and even seasoned pitmasters grapple with this detail, as the presence or absence of the membrane drastically affects the final product.
This comprehensive guide will definitively answer whether Kroger baby back ribs come with the membrane pre-removed, providing expert insights and practical tips to ensure your ribs are a culinary triumph. We’ll delve into why the membrane matters, how to identify it, and what to do if it’s still present. We aim to be the ultimate resource, saving you time, money, and potential barbecue disasters. You’ll learn not only about Kroger’s ribs but also gain a broader understanding of rib preparation techniques used by professionals.
Prepare to elevate your rib game with this in-depth exploration, backed by expert advice and practical guidance. Let’s get started!
Understanding the Rib Membrane: Why It Matters
The pleura, commonly referred to as the membrane, is a thin, silvery skin located on the bone side of the ribs. While it might seem insignificant, it plays a crucial role in the final texture and flavor of your cooked ribs.
* **Toughness:** The membrane is made of a dense connective tissue that doesn’t break down easily during cooking. Leaving it on results in chewier, less tender ribs. If not removed, the membrane constricts the meat as it cooks, preventing even rendering of fat and collagen.
* **Flavor Barrier:** The membrane acts as a barrier, preventing smoke and seasonings from fully penetrating the meat. This means you’re missing out on a crucial layer of flavor.
* **Texture Issues:** A properly removed membrane allows for a more uniform and pleasing texture throughout the ribs. Without its removal, the underside of the ribs can be noticeably tougher and less enjoyable.
Expert pitmasters universally agree: removing the membrane is a critical step for achieving competition-worthy ribs. It’s the difference between a good barbecue and a truly exceptional one.
So, Do Kroger Baby Back Ribs Come with the Membrane Removed?
The answer, unfortunately, isn’t always straightforward. **Generally, no, Kroger baby back ribs do not typically have the membrane removed.** However, this can vary based on location, specific cuts, and preparation styles offered at your local Kroger store. It’s always best to visually inspect the ribs before purchasing.
Here’s a breakdown of factors that might influence whether the membrane is present:
* **Butcher’s Preparation:** Some Kroger locations may have butchers who remove the membrane as part of their preparation process. This is more likely if you’re purchasing ribs from the butcher counter rather than pre-packaged ribs.
* **Pre-Seasoned Ribs:** Pre-seasoned or marinated ribs are *less* likely to have the membrane removed, as the manufacturer often prioritizes convenience over optimal texture.
* **Regional Variations:** Different regions may have different standards for rib preparation. What’s common in one state might not be in another.
* **Specialty Cuts:** Occasionally, Kroger may offer specialty cuts of ribs where the membrane has been removed. These are usually clearly labeled and priced higher.
**The best approach is to always check the ribs yourself.** Look for that telltale silvery skin on the bone side. If it’s there, plan to remove it before cooking.
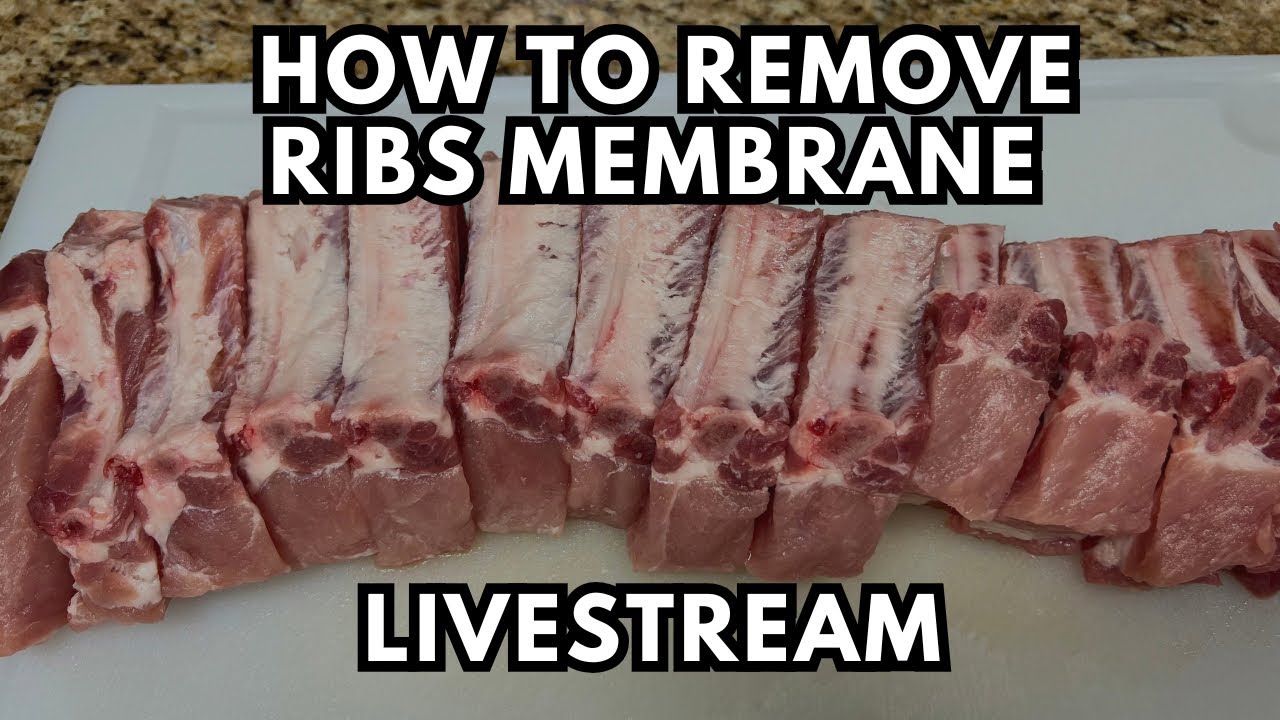
How to Identify the Rib Membrane: A Visual Guide
Identifying the rib membrane is simple once you know what to look for. Here’s a step-by-step guide:
1. **Locate the Bone Side:** Turn the rack of ribs over so the bone side is facing up. This is the side you’ll be inspecting.
2. **Look for the Silvery Skin:** The membrane appears as a thin, silvery-white or slightly translucent skin covering the bones. It might be partially obscured by fat or connective tissue, but it should be readily visible.
3. **Feel the Texture:** The membrane has a slightly tough, plastic-like feel. Gently scrape your fingernail across it. If it feels different from the surrounding meat, it’s likely the membrane.
4. **Check the Edges:** The membrane usually extends to the edges of the rib rack. Look for areas where it’s slightly lifted or peeling away. These are good starting points for removal.
If you’re still unsure, compare the ribs to online images or videos demonstrating membrane identification. A quick visual search will quickly clarify what you’re looking for.
Removing the Rib Membrane: A Step-by-Step Guide
Removing the rib membrane is a straightforward process that requires minimal tools and effort. Here’s a detailed guide:
1. **Gather Your Supplies:** You’ll need:
* A sharp knife (a butter knife works surprisingly well)
* Paper towels
* A cutting board
2. **Prepare the Ribs:** Place the ribs bone-side up on the cutting board.
3. **Loosen the Membrane:** Use the tip of your knife (or butter knife) to gently lift a corner of the membrane. A good starting point is usually near the middle of the rack, where the membrane is slightly looser.
4. **Grip with Paper Towel:** Once you’ve loosened a corner, use a paper towel to firmly grip the membrane. The paper towel provides a better grip and prevents your fingers from slipping.
5. **Pull and Separate:** Gently but firmly pull the membrane away from the ribs. Try to pull it off in one piece. If it tears, use the knife to loosen another section and continue pulling.
6. **Remove Remaining Pieces:** If any small pieces of membrane remain, use the knife to scrape them off. Ensure you remove as much of the membrane as possible.
7. **Inspect and Repeat:** Inspect the entire rack of ribs to ensure all the membrane has been removed. Repeat the process if necessary.
**Pro Tip:** If the membrane is particularly stubborn, try running the ribs under cold water for a few minutes. This can help loosen the membrane and make it easier to remove.
What If the Membrane Is Already Removed?
If you’re lucky enough to find Kroger baby back ribs with the membrane already removed, congratulations! You’ve saved yourself a step and can proceed directly to seasoning and cooking.
However, it’s still a good idea to inspect the ribs to ensure a thorough job was done. Sometimes, small pieces of membrane can be left behind. Remove these before continuing.
Also, consider that ribs with the membrane already removed might be slightly drier than those with the membrane intact. This is because the membrane helps retain moisture during cooking. To compensate, consider using a more generous amount of marinade or basting sauce.
Kroger Baby Back Ribs: A Quality Assessment
Kroger baby back ribs are a generally good option for home cooks looking for affordable and readily available ribs. Here’s a breakdown of their quality:
* **Meat Quality:** The meat quality is typically decent, with a good amount of marbling. However, it can vary depending on the grade of ribs and the specific supplier.
* **Freshness:** Freshness is generally good, especially if you purchase ribs from the butcher counter. Check the sell-by date to ensure optimal quality.
* **Consistency:** Consistency can be an issue. Some racks of ribs might be meatier and more uniform than others. Take your time to select the best-looking rack.
* **Price:** Kroger baby back ribs are usually competitively priced, making them an attractive option for budget-conscious consumers.
Overall, Kroger baby back ribs offer a good balance of quality and affordability. With proper preparation and cooking, they can produce delicious and satisfying results.
Expert Tips for Cooking Kroger Baby Back Ribs
Here are some expert tips to help you cook Kroger baby back ribs to perfection:
* **Start with Quality Seasoning:** Use a high-quality dry rub or marinade to infuse the ribs with flavor. Experiment with different flavor profiles to find your favorite.
* **Low and Slow is Key:** Cook the ribs at a low temperature (around 225-250°F) for a long time. This allows the connective tissue to break down, resulting in tender, fall-off-the-bone ribs.
* **The 3-2-1 Method:** The 3-2-1 method is a popular technique for cooking baby back ribs. It involves smoking the ribs for 3 hours, wrapping them in foil with liquid for 2 hours, and then unwrapping them and cooking them for 1 hour.
* **Monitor Internal Temperature:** Use a meat thermometer to monitor the internal temperature of the ribs. They’re typically done when they reach an internal temperature of 195-205°F.
* **Rest Before Slicing:** Allow the ribs to rest for at least 15 minutes before slicing. This allows the juices to redistribute, resulting in more flavorful and moist ribs.
By following these tips, you can consistently produce delicious and tender ribs, no matter where you buy them.
Alternatives to Kroger Baby Back Ribs
While Kroger baby back ribs are a convenient option, there are other alternatives to consider:
* **Butcher Shops:** Local butcher shops often offer higher-quality ribs with more consistent marbling and freshness.
* **Specialty Meat Markets:** Specialty meat markets are another great option for finding premium ribs. They often carry unique cuts and grades that aren’t available at grocery stores.
* **Online Retailers:** Several online retailers sell high-quality ribs that can be shipped directly to your door. This is a convenient option if you don’t have access to a good butcher shop or meat market.
When choosing an alternative, consider your budget, quality preferences, and convenience requirements.
The Science Behind Tender Ribs: Collagen Breakdown
The secret to tender, fall-off-the-bone ribs lies in understanding collagen breakdown. Collagen is a tough, fibrous protein found in connective tissue. When cooked at low temperatures for an extended period, collagen breaks down into gelatin, which is a soft, melt-in-your-mouth substance.
This process is crucial for achieving the desired texture in ribs. The low and slow cooking method allows the collagen to break down without drying out the meat. This is why patience is key when cooking ribs.
The removal of the membrane also contributes to collagen breakdown. By removing the membrane, you allow heat and moisture to penetrate the meat more evenly, promoting more uniform collagen breakdown.
Understanding Different Rib Cuts: Baby Back vs. Spare Ribs
It’s important to understand the difference between baby back ribs and spare ribs. While both come from the pig, they are different cuts with distinct characteristics.
* **Baby Back Ribs:** These are cut from the upper portion of the rib cage, closer to the backbone. They are typically shorter, leaner, and more tender than spare ribs.
* **Spare Ribs:** These are cut from the lower portion of the rib cage, closer to the belly. They are typically larger, fattier, and more flavorful than baby back ribs.
The choice between baby back ribs and spare ribs depends on your personal preferences. Baby back ribs are a good option if you prefer leaner, more tender ribs. Spare ribs are a good option if you prefer fattier, more flavorful ribs.
Kroger’s Commitment to Quality Meats
Kroger has made significant strides in recent years to improve the quality and sourcing of its meat products. They have implemented stricter standards for animal welfare and sustainability, and they are committed to providing customers with fresh, high-quality meats.
This commitment extends to their rib selection. While the presence of the membrane may vary, Kroger is dedicated to offering customers a wide variety of rib cuts and preparation styles to meet their needs.
Q&A: Your Burning Rib Questions Answered
**Q1: What’s the best way to season Kroger baby back ribs?**
A: The best way to season ribs is to use a dry rub. A good dry rub will contain a blend of spices, herbs, and sugars that will complement the flavor of the pork. Apply the rub generously to all sides of the ribs at least 30 minutes before cooking.
**Q2: Can I cook ribs in the oven if I don’t have a smoker or grill?**
A: Absolutely! Oven-baked ribs can be just as delicious as smoked or grilled ribs. Simply bake them at a low temperature (250-275°F) for 3-4 hours, or until they are tender and easily pull away from the bone.
**Q3: What’s the best liquid to use when wrapping ribs in foil?**
A: Many liquids work well, including apple juice, beer, broth, or even just water. The liquid helps to create steam, which tenderizes the ribs and infuses them with flavor.
**Q4: How can I tell if my ribs are done?**
A: The best way to tell if ribs are done is to use a meat thermometer. They should reach an internal temperature of 195-205°F. You can also use the “bend test.” If the ribs bend easily and the meat cracks on the surface, they are likely done.
**Q5: Can I freeze leftover cooked ribs?**
A: Yes, cooked ribs can be frozen for up to 2-3 months. Wrap them tightly in plastic wrap and then place them in a freezer bag. Thaw them in the refrigerator before reheating.
**Q6: What’s the best way to reheat cooked ribs?**
A: The best way to reheat ribs is to bake them in the oven at a low temperature (250°F) until they are warmed through. You can also reheat them in the microwave, but they may become slightly dry.
**Q7: Can I use a pressure cooker to cook ribs?**
A: Yes, a pressure cooker can be used to cook ribs quickly. However, be careful not to overcook them, as they can become mushy. Follow the manufacturer’s instructions for cooking ribs in a pressure cooker.
**Q8: What’s the difference between St. Louis-style ribs and spare ribs?**
A: St. Louis-style ribs are spare ribs that have been trimmed of the sternum bone, rib tips, and excess fat, creating a more uniform and rectangular shape. They are often preferred for competition barbecue.
**Q9: Should I add sauce before or after cooking ribs?**
A: It’s generally best to add sauce during the last 30-60 minutes of cooking. This allows the sauce to caramelize and adhere to the ribs without burning. Avoid adding sauce too early, as the sugars in the sauce can burn and create a bitter flavor.
**Q10: What side dishes go well with ribs?**
A: Popular side dishes for ribs include coleslaw, potato salad, baked beans, corn on the cob, and macaroni and cheese.
Conclusion: Mastering the Art of Kroger Baby Back Ribs
In conclusion, while **Kroger baby back ribs may not consistently have the membrane removed**, understanding how to identify and remove it yourself is a crucial step towards achieving barbecue perfection. By following the expert tips and techniques outlined in this guide, you can consistently produce tender, flavorful, and fall-off-the-bone ribs that will impress your family and friends. Remember, the key to great ribs is patience, attention to detail, and a willingness to experiment with different flavors and techniques.
Now that you’re armed with this comprehensive knowledge, it’s time to fire up the grill or oven and put your newfound skills to the test. Share your rib-cooking experiences and favorite recipes in the comments below! And if you’re looking for more advanced barbecue tips and techniques, explore our other expert guides on smoking, grilling, and meat preparation.
Happy grilling!
