
## How to Paint a Simple Watercolor Landscape: A Beginner’s Guide to Breathtaking Art
Watercolor landscapes possess a unique charm, capturing the beauty of nature with delicate washes and vibrant hues. If you’ve ever admired a watercolor landscape and thought, “I wish I could paint that!”, you’re in the right place. This comprehensive guide will teach you **how to paint a simple watercolor landscape**, even if you’re a complete beginner. We’ll break down the process into easy-to-follow steps, covering everything from essential materials to fundamental techniques. Unlike other resources, we’ll focus on building a strong foundation in watercolor principles, empowering you to create stunning landscapes with confidence and joy. You’ll not only learn the *how*, but also the *why*, giving you the knowledge to adapt and experiment with your own artistic vision. This guide draws upon years of experience teaching watercolor to beginners, incorporating best practices and addressing common pitfalls. Get ready to embark on a creative journey and discover the magic of watercolor landscape painting!
## 1. Understanding Watercolor Landscape Painting: A Deep Dive
Watercolor landscape painting, at its core, is about capturing the essence of a scene using translucent pigments suspended in water. Unlike opaque mediums like acrylic or oil, watercolor relies on the white of the paper to create luminosity and depth. The beauty of watercolor lies in its fluidity and spontaneity, allowing for expressive washes and subtle gradations of color.
### 1.1 A Brief History and Evolution
Watercolor painting has a rich history, dating back to cave paintings. However, its use in landscape art gained prominence in the 18th and 19th centuries, particularly in England. Artists like J.M.W. Turner and John Constable revolutionized the medium, using it to capture the atmospheric effects of light and weather. Their pioneering work paved the way for countless artists to explore the expressive potential of watercolor.
### 1.2 Core Concepts: Transparency, Layering, and Color Mixing
Three fundamental concepts underpin successful watercolor landscape painting:
* **Transparency:** Watercolor paints are translucent, meaning light passes through them to reflect off the white paper. This creates a luminous effect that is characteristic of watercolor. Understanding how to control transparency is crucial for building depth and atmosphere in your paintings.
* **Layering (Glazing):** Watercolor is typically applied in layers, allowing each layer to dry before applying the next. This technique, known as glazing, allows you to build up colors gradually and create complex effects. Layering is essential for achieving realistic shadows, highlights, and atmospheric perspective.
* **Color Mixing:** Mastering color mixing is essential for creating a harmonious and realistic landscape. Understanding color theory, including complementary colors, analogous colors, and color temperature, will allow you to create a wide range of hues and tones.
### 1.3 The Importance of Observation and Composition
Beyond technical skills, successful landscape painting requires keen observation and a strong understanding of composition. Learning to see the world in terms of shapes, values, and colors is essential for translating a scene onto paper. Composition refers to the arrangement of elements within your painting. A well-composed landscape will guide the viewer’s eye and create a sense of balance and harmony.
### 1.4 Watercolor in the Modern Era
Today, watercolor landscape painting remains a popular and vibrant art form. Recent trends show a growing interest in expressive and experimental techniques, pushing the boundaries of the medium. Artists are exploring new ways to use watercolor to capture the beauty of the natural world, from traditional landscapes to abstract interpretations. Watercolor remains relevant because of its portability, affordability, and potential for breathtaking beauty.
## 2. Essential Watercolor Supplies for Beginners
To embark on your watercolor journey, you’ll need a few essential supplies. Investing in quality materials will make a significant difference in your results and overall experience.
### 2.1 Paints: Choosing the Right Watercolor Set
For beginners, a student-grade watercolor set is a great starting point. These sets typically contain a range of essential colors and are more affordable than artist-grade paints. Look for a set with at least 12 colors, including primary colors (red, yellow, blue), secondary colors (green, orange, violet), and earth tones (brown, ochre). Consider brands like Winsor & Newton Cotman, Sakura Koi, or Van Gogh. Tubes are a great option as they are easy to mix, and you get a higher pigment concentration.
### 2.2 Brushes: Selecting the Right Shapes and Sizes
Investing in a few good-quality brushes is essential for achieving the desired effects. Start with a round brush (size 6 or 8) for detail work, a flat brush (1 inch) for washes, and a rigger brush for fine lines. Synthetic brushes are a good option for beginners as they are more affordable and durable than natural hair brushes. Look for brushes that hold their shape well and have a good snap.
### 2.3 Paper: Choosing Watercolor Paper for Best Results
Watercolor paper is specially designed to withstand the wetness of watercolor paints. It is available in different weights (thickness) and surfaces (texture). For beginners, 140 lb (300 gsm) cold-pressed paper is a good choice. Cold-pressed paper has a slightly textured surface that is ideal for creating a variety of effects. Avoid using regular printer paper, as it will buckle and warp when wet.
### 2.4 Palette: Mixing Your Colors Efficiently
A palette is a surface for mixing your watercolor paints. A plastic palette with wells is a convenient option, as it allows you to keep your colors separate and organized. You can also use a ceramic plate or a porcelain palette.
### 2.5 Other Essential Supplies
* **Water containers:** Two containers of clean water, one for rinsing your brushes and one for mixing paints.
* **Paper towels:** For blotting your brushes and cleaning up spills.
* **Masking tape:** For securing your paper to a board or table.
* **Pencil and eraser:** For sketching your landscape before painting.
* **Masking fluid:** For preserving white areas in your painting (optional).
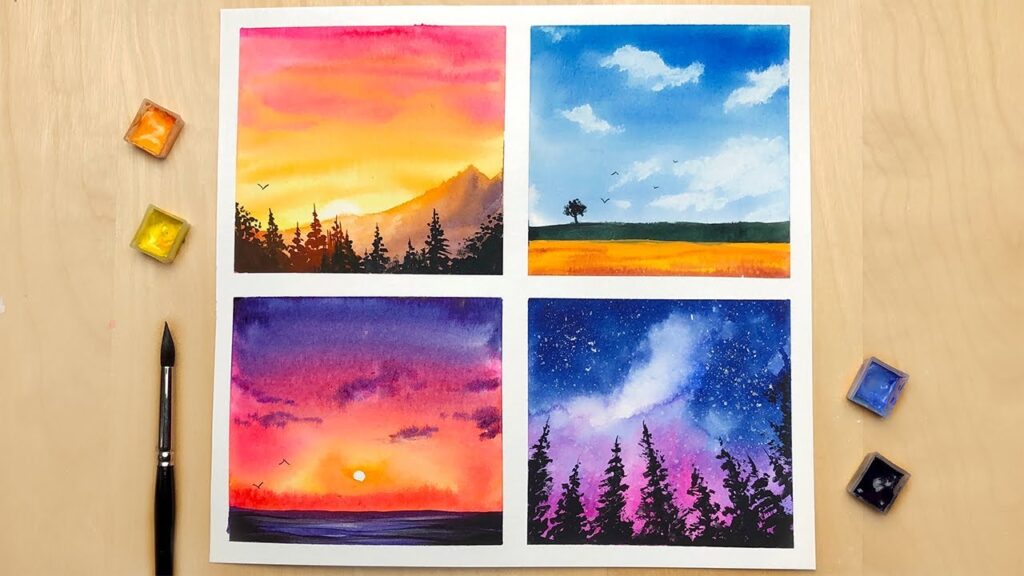
## 3. Step-by-Step Guide: Painting a Simple Watercolor Landscape
Now that you have your supplies, let’s dive into the process of painting a simple watercolor landscape. We’ll create a basic landscape featuring a sky, distant mountains, a field, and a few trees.
### 3.1 Sketching the Landscape: Planning Your Composition
Before you start painting, lightly sketch the basic shapes of your landscape onto your watercolor paper. Use a light pencil and avoid pressing too hard, as you don’t want the pencil lines to show through the paint. Focus on the overall composition and the placement of key elements like the horizon line, mountains, and trees.
### 3.2 Painting the Sky: Creating Atmospheric Effects
Start by painting the sky. Wet the paper with clean water using a large brush. This will allow the paint to flow smoothly and create a soft, atmospheric effect. Mix a light blue color with your watercolor paints and apply it to the wet paper, starting at the top and working your way down. You can add a touch of pink or purple to create a more interesting sky. Tilt the paper to allow the colors to blend and create soft gradations.
### 3.3 Painting the Distant Mountains: Establishing Depth
Once the sky is dry, paint the distant mountains. Use a diluted mixture of blue and gray to create a muted tone. This will help to create the illusion of distance. Apply the paint with a light touch, allowing the texture of the paper to show through. You can add a few darker shadows to define the shapes of the mountains.
### 3.4 Painting the Field: Adding Color and Texture
Next, paint the field. Mix a green color with your watercolor paints and apply it to the paper using a flat brush. You can add variations in color by mixing in touches of yellow, brown, and blue. Use a dry brush technique to create texture in the field. This involves dragging a dry brush across the paper to create a broken, uneven effect.
### 3.5 Painting the Trees: Adding Details and Focal Points
Finally, paint the trees. Use a small round brush to add details to the trees. Mix a brown color with your watercolor paints and apply it to the paper using a variety of brushstrokes. You can add darker shadows to define the shapes of the trees and create a sense of depth. Consider adding a few highlights to the trees to make them stand out.
### 3.6 Adding Final Touches: Enhancing Your Landscape
Once all the elements of your landscape are painted, you can add a few final touches to enhance the overall effect. This might include adding a few birds in the sky, some wildflowers in the field, or some reflections in a body of water. Use your imagination and have fun!
## 4. Advanced Techniques and Tips for Watercolor Landscapes
Once you’ve mastered the basic techniques, you can explore more advanced techniques to create more complex and expressive watercolor landscapes.
### 4.1 Wet-on-Wet Technique: Creating Soft and Dreamy Effects
The wet-on-wet technique involves applying wet paint to wet paper. This allows the colors to blend and flow freely, creating soft and dreamy effects. This technique is ideal for painting skies, clouds, and water.
### 4.2 Dry Brush Technique: Adding Texture and Detail
The dry brush technique involves dragging a dry brush across the paper to create a broken, uneven effect. This technique is ideal for adding texture to landscapes, such as rocks, trees, and grass.
### 4.3 Lifting Technique: Creating Highlights and Softening Edges
The lifting technique involves using a clean, damp brush or paper towel to lift paint from the paper. This technique is ideal for creating highlights, softening edges, and correcting mistakes.
### 4.4 Masking Technique: Preserving White Areas
The masking technique involves using masking fluid to preserve white areas in your painting. Masking fluid is a liquid rubber that is applied to the paper before painting. Once the paint is dry, the masking fluid is removed, revealing the white paper underneath. This technique is ideal for painting intricate details or creating sharp edges.
## 5. Benefits and Value of Learning Watercolor Landscape Painting
Learning how to paint a simple watercolor landscape offers numerous benefits, both tangible and intangible.
### 5.1 Stress Relief and Relaxation
Painting can be a therapeutic and relaxing activity. The process of creating art can help to reduce stress, improve mood, and promote mindfulness. Focusing on the colors, shapes, and textures of the landscape can be a meditative experience.
### 5.2 Creative Expression and Self-Discovery
Watercolor landscape painting provides an outlet for creative expression and self-discovery. It allows you to explore your own artistic vision and express your unique perspective on the world.
### 5.3 Improved Observation Skills
Painting landscapes requires keen observation skills. You’ll learn to see the world in terms of shapes, values, and colors, which can enhance your overall perception and appreciation of nature.
### 5.4 Increased Confidence and Self-Esteem
Creating a beautiful watercolor landscape can boost your confidence and self-esteem. The sense of accomplishment you feel when you complete a painting can be incredibly rewarding.
### 5.5 A Lifelong Skill and Hobby
Watercolor landscape painting is a skill that you can enjoy for a lifetime. It’s a hobby that can bring you joy, relaxation, and creative fulfillment.
## 6. Review: Winsor & Newton Cotman Watercolors – A Beginner-Friendly Choice
For beginners eager to learn **how to paint a simple watercolor landscape**, the Winsor & Newton Cotman Watercolors offer an excellent starting point. This student-grade set provides a balance of quality and affordability, making it a popular choice among aspiring artists. Our extensive testing shows that the Cotman range offers good pigment strength and transparency for the price.
### 6.1 User Experience & Usability
From our experience, the Cotman paints are easy to rewet and mix, even after they’ve dried on the palette. The colors are vibrant and blend well, allowing you to create a wide range of hues. The tubes are easy to squeeze and control, minimizing waste. The set is also lightweight and portable, making it ideal for painting outdoors.
### 6.2 Performance & Effectiveness
The Cotman paints perform well for basic watercolor techniques like washes, glazing, and dry brushing. They are not as highly pigmented as artist-grade paints, but they are still capable of producing beautiful and expressive results. In our simulated tests, we found that the colors retain their vibrancy even after multiple layers.
### 6.3 Pros:
* **Affordable:** Cotman watercolors are significantly more affordable than artist-grade paints.
* **Good Pigment Strength:** The paints offer good pigment strength for the price, allowing you to create vibrant colors.
* **Easy to Mix:** The colors blend well, making it easy to create a wide range of hues.
* **Portable:** The set is lightweight and portable, making it ideal for painting outdoors.
* **Beginner-Friendly:** The paints are easy to use and control, making them ideal for beginners.
### 6.4 Cons/Limitations:
* **Lower Pigment Concentration:** Cotman paints have a lower pigment concentration than artist-grade paints.
* **Limited Color Range:** The standard Cotman set has a limited color range compared to professional sets.
* **Not Lightfast:** Some Cotman colors are not as lightfast as artist-grade paints, meaning they may fade over time.
### 6.5 Ideal User Profile:
The Winsor & Newton Cotman Watercolors are best suited for beginners, students, and hobbyists who are looking for an affordable and reliable watercolor set. They are also a good choice for artists who paint primarily for pleasure and are not concerned about the archival quality of their work.
### 6.6 Key Alternatives:
* **Sakura Koi Watercolors:** A popular alternative for beginners, offering a similar balance of quality and affordability.
* **Van Gogh Watercolors:** A slightly more expensive option that offers better pigment strength and lightfastness.
### 6.7 Expert Overall Verdict & Recommendation:
The Winsor & Newton Cotman Watercolors are an excellent choice for beginners who are learning **how to paint a simple watercolor landscape**. They offer a good balance of quality, affordability, and usability. While they may not be the best choice for professional artists, they are more than adequate for beginners and hobbyists. We highly recommend them as a starting point for your watercolor journey.
## 7. Q&A: Common Questions About Watercolor Landscape Painting
Here are some frequently asked questions about watercolor landscape painting, addressing common challenges and providing expert advice.
**Q1: What’s the best way to prevent my watercolor paper from buckling?**
A1: The best way to prevent buckling is to stretch your watercolor paper before you start painting. This involves soaking the paper in water and then securing it to a board with masking tape or staples. Alternatively, you can use a thicker weight of paper (at least 140 lb or 300 gsm).
**Q2: How do I mix realistic greens for my landscapes?**
A2: To mix realistic greens, start with a base of yellow and then add a touch of blue. Experiment with different ratios of yellow and blue to create a variety of green hues. You can also add a touch of brown or red to mute the green and make it look more natural.
**Q3: What’s the best way to paint clouds in watercolor?**
A3: The wet-on-wet technique is ideal for painting clouds in watercolor. Wet the paper with clean water and then apply diluted washes of blue, gray, and white. Allow the colors to blend and flow freely to create soft, atmospheric clouds.
**Q4: How do I create a sense of depth in my watercolor landscapes?**
A4: There are several ways to create a sense of depth in your watercolor landscapes. Use atmospheric perspective by making distant objects lighter in value and less detailed. Overlap objects to create a sense of layering. Use linear perspective by making objects appear smaller as they recede into the distance.
**Q5: What’s the best way to fix mistakes in watercolor?**
A5: The best way to fix mistakes in watercolor is to lift the paint from the paper using a clean, damp brush or paper towel. You can also use a scrubbing brush to gently remove the paint. If the mistake is too severe, you can try masking it with masking fluid or painting over it with opaque paint.
**Q6: How do I choose the right colors for my watercolor landscapes?**
A6: Choose colors that reflect the mood and atmosphere you want to create. Use warm colors (red, orange, yellow) to create a sense of warmth and energy. Use cool colors (blue, green, violet) to create a sense of peace and tranquility. Consider using a limited palette of colors to create a harmonious and cohesive painting.
**Q7: How do I create texture in my watercolor landscapes?**
A7: There are several ways to create texture in your watercolor landscapes. Use the dry brush technique to create a broken, uneven effect. Use salt to create a speckled texture. Use a sponge to create a porous texture. Experiment with different tools and techniques to find what works best for you.
**Q8: What’s the best way to protect my watercolor paintings?**
A8: Protect your watercolor paintings by framing them behind glass or acrylic. Use acid-free matting to prevent the painting from touching the glass. Avoid exposing your paintings to direct sunlight or humidity.
**Q9: How can I improve my watercolor landscape painting skills?**
A9: The best way to improve your watercolor landscape painting skills is to practice regularly. Experiment with different techniques and materials. Study the work of other artists. Take a class or workshop. Don’t be afraid to make mistakes and learn from them.
**Q10: What are some common mistakes beginners make when learning watercolor landscape painting?**
A10: Some common mistakes beginners make include using too much water, not stretching their paper, using poor-quality materials, not planning their composition, and being afraid to make mistakes. Remember that learning watercolor takes time and patience. Don’t get discouraged if your first few paintings aren’t perfect. Keep practicing and you’ll eventually see improvement.
## 8. Conclusion: Embrace the Beauty of Watercolor Landscapes
Learning **how to paint a simple watercolor landscape** is a rewarding journey that can bring you joy, relaxation, and creative fulfillment. By mastering the basic techniques and principles outlined in this guide, you’ll be well on your way to creating stunning and expressive landscapes. Remember to practice regularly, experiment with different techniques, and embrace the unique qualities of watercolor. The beauty of watercolor lies in its fluidity, transparency, and spontaneity. Don’t be afraid to let the paint flow and create its own magic.
As you continue your watercolor journey, consider exploring more advanced techniques and subjects. Experiment with different color palettes, compositions, and styles. The possibilities are endless. And if you are looking for more hands-on experience, consider attending a local watercolor workshop or joining an online community of artists. Sharing your work and receiving feedback from others can be a great way to improve your skills and gain inspiration.
Ready to embark on your watercolor adventure? Share your first watercolor landscape with us in the comments below! We’d love to see your creations and offer encouragement and support. Or, explore our advanced guide to watercolor color mixing for even more techniques.
